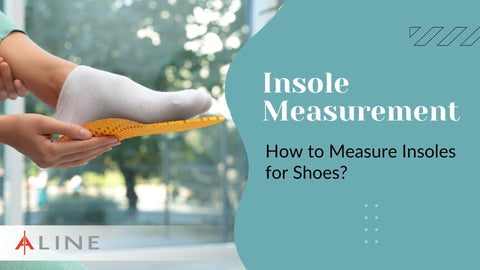
Insole Measurement: How to Measure Insoles for Shoes?
Summary
- Measuring insoles accurately helps prevent discomfort, misalignment, and injury.
- Simple tools like a ruler and tracing paper can determine the correct insole sizing.
- Activity type and shoe style should be factored into choosing the right insoles.
- Accurate width and length measurement ensures optimal foot support and shoe compatibility.
- ALINE Insoles offer patented alignment technology to enhance comfort and performance.
Choosing the right insole is essential for overall foot health, alignment, and comfort. Ill-fitting insoles may cause issues such as foot pain, joint strain, and long-term misalignment. Measuring insoles correctly is a fundamental yet often overlooked step in selecting footwear that provides proper support.
Understanding foot dimensions, insole compatibility, and specific needs based on activity can significantly improve the effectiveness of the insoles used. This article provides a comprehensive and practical guide to measuring insoles accurately to ensure a better fit and improved performance.
Tools Needed for Measuring Insoles
A few simple tools are all that’s needed to measure insoles accurately. These are likely already available at home:
Use a flexible tape measure or a ruler for measuring length and width, a blank sheet of paper for tracing your feet, and a pen or pencil to capture the outline clearly. Together, these tools offer a straightforward way to determine your correct insole size.
Step-by-Step Guide to Measuring Insoles
Accurate measurement requires a methodical approach. The following steps provide clarity and consistency in determining the correct insole size.
Step 1: Trace Your Foot
Begin by tracing the shape of each foot for a visual and dimensional reference.
- Place a sheet of paper on a hard, flat surface.
- Stand with equal weight on both feet.
- Use a pen or pencil to trace the outline of each foot carefully.
- Trace both feet, as one may be slightly larger than the other.
Step 2: Measure Foot Length
Once the outline is complete, calculate the length from toe to heel.
- Measure from the tip of the longest toe to the end of the heel.
- Use the larger of the two foot measurements when determining insole size.
Step 3: Measure Foot Width
Width is just as important as length in ensuring a proper fit.
- Identify the widest part of the foot, usually around the ball.
- Measure and record the width for each foot.
- Use the larger width when selecting an insole.
Step 4: Compare Measurements to Insole Sizes
Next, refer to brand-specific sizing guides to match your measurements.
- Most manufacturers offer size charts that align foot length and width with appropriate insole sizes.
- If insoles are removable from existing shoes, measure them directly for comparison.
Common Mistakes to Avoid
Even with good intentions, it's easy to make small errors that lead to a poor fit and reduced comfort.
One of the most common mistakes is ignoring foot width. Many people only measure length and end up with insoles that are either too narrow or too wide. Another frequent error is using old, worn-out shoes as a reference point. Footwear that’s lost its original structure won’t give an accurate insole size.
Perhaps most importantly, skipping the tracing step leads to incomplete measurements. A traced outline gives a clear picture of your foot's shape, ensuring that your insole choice is based on actual dimensions rather than estimates.
Conclusion
Measuring your insoles properly is a simple but critical step toward better foot health and overall well-being. Whether you're an athlete, a healthcare worker, or someone who spends long hours on your feet, the right insole ensures your body stays in alignment and your feet feel supported.
Foot shape, shoe compatibility, and activity-specific needs all play a role in finding the perfect fit. Tracing, measuring, and referencing sizing charts can save time, reduce injury risk, and elevate comfort throughout your day.
Recent Posts
-
 Apr 16, 2025
What Should I Do If...
-
 Apr 16, 2025
How to Break in New...
-
 Apr 16, 2025
Common Foot Problems That Insoles...
-
 Feb 25, 2025
Trending As Seen on TV...
-
 Feb 24, 2025
Trending Now: The Best Viral...
-
 Feb 21, 2025
Orthotics for Neuropathy Feet: A...
-
 Feb 20, 2025
Best Insoles for Burning Feet...
-
 Feb 19, 2025
Choosing Insoles to Make Your...
-
 Feb 18, 2025
Can You Add a Thicker...
-
 Jan 30, 2025
Find the Perfect As Seen...
-
 Jan 29, 2025
Inventel TV and ALINE Insoles:...
-
 Jan 27, 2025
The Difference Between Diabetic Shoe...
-
 Jan 23, 2025
Best Shoe Insoles for Kids:...
-
 Jan 01, 2025
From DRTV to Top Choice:...


